In this tutorial, we will go through the configuration required to have your environment ready to begin writing code for the MiX Integrate APIs.
Creating a projectAdding Required References to project
Adding MiX Integrate Assemblies
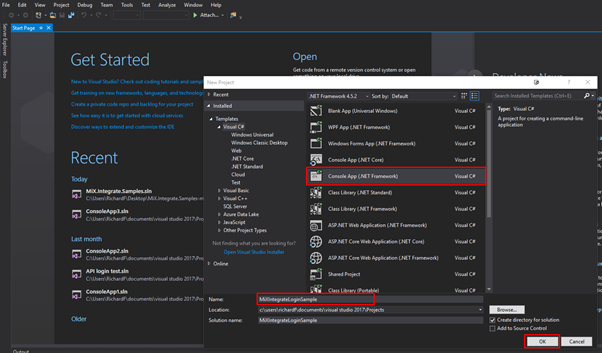
Creating a project
In Visual Web Developer create your new project by using File > New > Project. For these tutorials we are using Console App (.NET Framework) as a GUI is not required. Give your project a name and click OK.
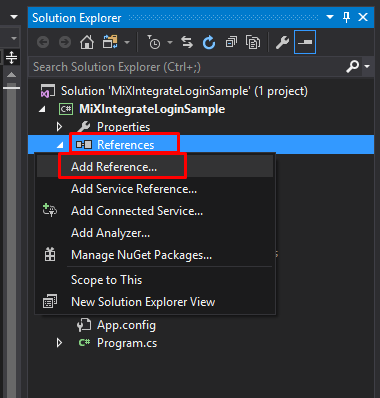
Adding Required References to project
Once the project has been created it is required to add the MiX.Integrate Libraries to the solution. To do this right click on References in the Solution Explorer and select Add Reference...
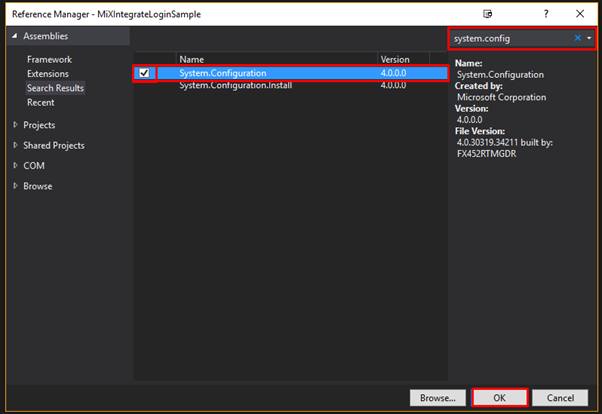
In the Reference Manager, use the search box and filter for System.Configuration. Select the checkbox to the left and click OK to install the reference.
Adding MiX Integrate Assemblies
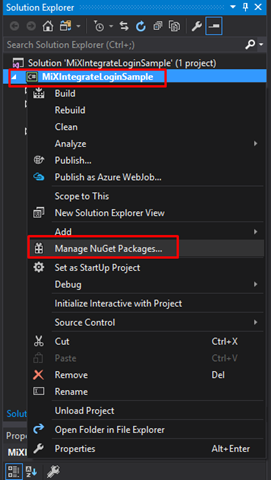
Once the reference has been added, it is required to install the MiX.Integrate Assembly. This is done again in the Solution Explorer by right clicking on the project and selecting Manage NuGet Packages...
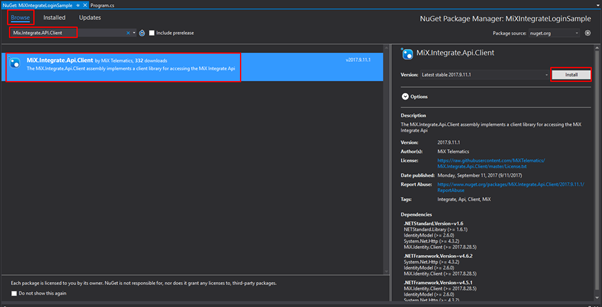
In the NuGet Package Manager click on Browse. Then using the search function, search for Mix.Integrate.API.Client. Highlight the assembly and click on Install.
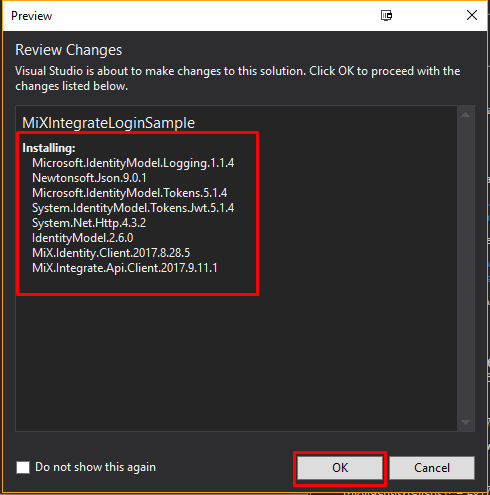
Once you have clicked Install, a Preview window should open showing all the dependant assemblies that will be installed. Click OK and accept any licence acceptance messages that may appear.
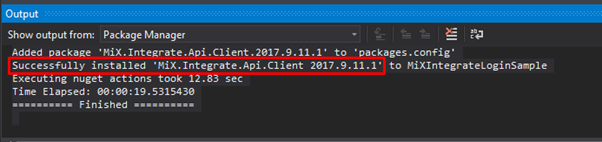
Once complete you should see the below message in the Output window at the bottom of the application.